Do you hate all of the hassle that comes with boiling eggs so you can decorate them for Easter? It seems like I end up with 2 or 3 eggs that are cracked and the egg oozes out while they are boiling so that I have yucky boiled egg clinging desperately to the outer shell.
Then, my kids’ hands always ended up blue or red or purple because they had to rescue their eggs from the solution after the eggs fell off that scrawny, flimsy little metal holder that was supposed to be used to dip the egg into the dying solution.
And even though my kids wore crafting aprons to protect their clothes, somehow they always seemed to get the dye on their clothing. (Note to self: make sure kids don’t wear good clothing while dying Easter eggs.)
I’m not too thrilled with the idea of dying Easter eggs with grandkids. I’m REALLY paranoid about gettin dye on their clothes — which their mothers would not appreciate. No siree, Bob!
So if you want to do an Easter craft with your grandkids, dyed boiled eggs might not be a great idea.
However! Making a Mod Podge Easter egg is better. Mod Podge washes off. Mod Podge doesn’t stain hands. Mod Podge doesn’t stain clothes. Hooray for Mod Podge!
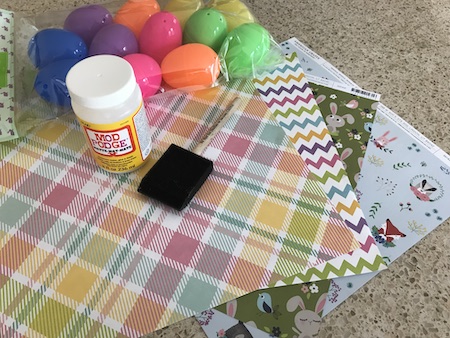
Here are the supplies that you’ll need for making Mod Podge Easter eggs:
- plastic Easter eggs
- paper with Easter designs
- Mod Pode
- sponge brush
- empty egg carton
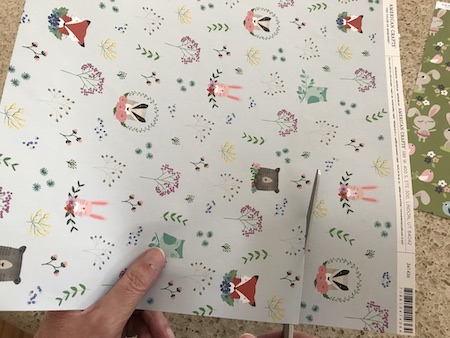
Lemme first talk a bit about the type of paper to use. Craft stores have 8.5″ x 11″ paper (that is like copy paper) that has Easter designs on it. This thickness of paper is the best to use.
Some scrapbook paper is thicker. Thicker paper doesn’t seem to stick down very good to the Mod Podge (voice of experience here) and it’s harder to work with. I recommend avoiding the thicker scrapbook paper if possible.
But then sometimes when you come late to the crafting game and Easter is just a few days away, the selection of Easter paper can be quite limited. Ahem. Just sayin’.
Next, I just want to briefly talk about an appropriate age for grandkids doing this craft. Getting the paper to stick to the Mod Podge can be somewhat tricky. You have to keep pressing the paper down to make sure it sticks to the egg. Sometimes the paper sticks to your fingers and will come off in patches when you take your fingers off the paper.
I’m not sure if pre-school kids have the ability (or patience) for this craft. I would say your grandkids should be 8 years-old to make these eggs.
Okay. Let’s get to making these eggs!
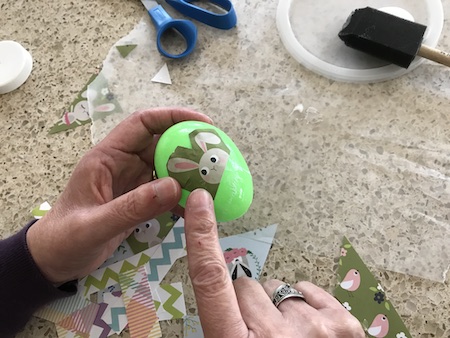
Cut your paper into different sizes that are rather smallish — circles, squares, rectangles. I cut around the bunnies so that I’d make sure I had them on an egg.
Spread Mod Podge on part of your plastic egg.
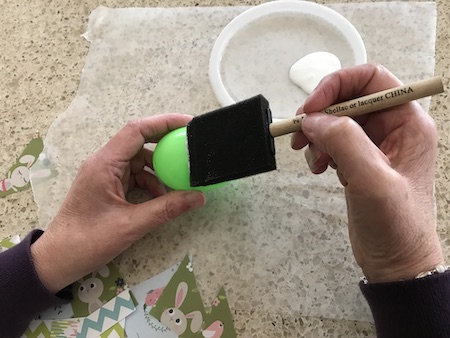
Put a piece of paper on your egg where you spread the Mod Podge. Press down to make sure there aren’t any bubbles under the paper.
Continue adding paper until one end of the egg is covered with paper. Put your egg in an empty egg carton while the Mod Podge dries.
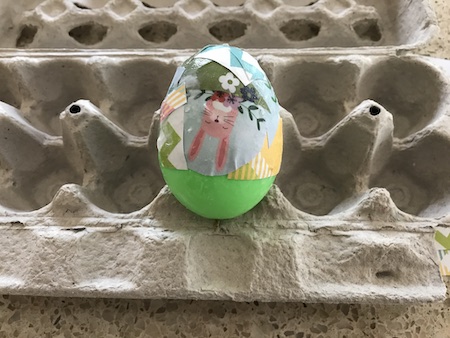
When the Mod Podge is dry, add Mod Podge and paper to the other end of the egg. When that end is all covered, let it dry.
Spread a top coat of Mod Podge on one end of the egg. Let it dry. Coat the other end. Let it dry.
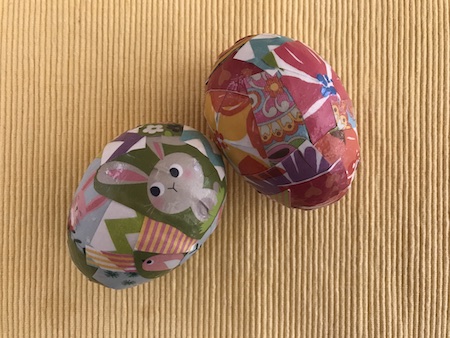
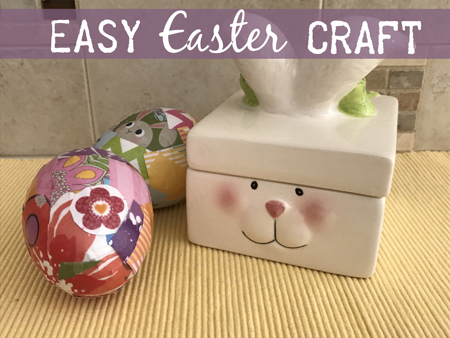
I made to 2 Easter eggs. Here they are, patiently waiting while they are drying.
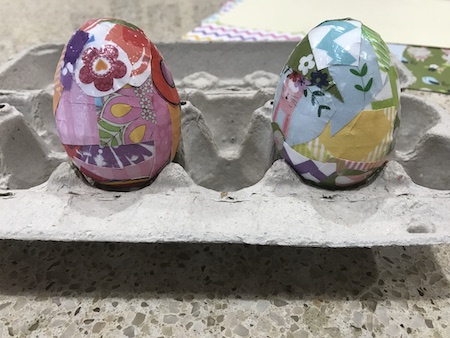
When the top coat is dry, your Easter craft is finished!!