
Junk journals have been around for a while. I’ve wanted to make one.
But.
Most of them are mainly for display.
I’m a minimalist and don’t particularly care for a lot of bric-a-brac.
However! I’m always using a notebook!
So why not make a ‘junk journal’ notebook? I ask you. Yes, indeedy. Why not.
If it weren’t for COVID, I’d have my granddaughters come to my house and make one. As it is, I made the notebooks and mailed them to my granddaughters.
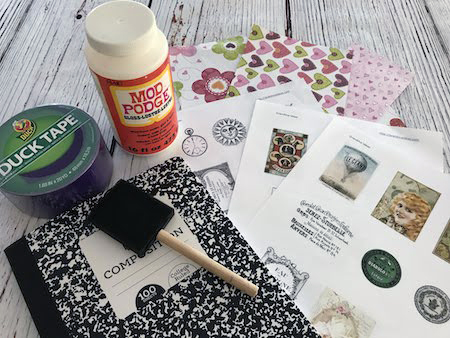
To make a junk journal notebook, you will need:
- a composition notebook
- colored duct tape
- Mod Podge
- sponge brush
- scraps of scrapbook paper
- copies of my free ephemera printables
I spent WAY too much time finding free ephemera to share with you. (But I sure had fun!) Here’s a list of my free printables of images that you can print. (Make sure you print on a laster printer. More about that later.)
So, in no particular order:
- stamps
- bottles 1, bottles 2, bottles 3 (perfume), bottles 4
- old churches
- old bridges
- castles (in black and white), castles (colored)
- ephemera 1, ephemera 2, ephemera 3, ephemera 4, ephemera 5, ephemera 6
- dogs
- cats 1, cats 2
- miscellaneous 1, miscellaneous 2, miscellaneous 3 (all of these are black-and-white)
- miscellaneous 4, miscellaneous 5, miscellaneous 6, miscellaneous 7 (most are in color)
- antique keys
- moons
- labels 1, labels 2, labels 3, labels 4 (these are of different products)
- old postcards, feminine postcards
Phew! That’s quite a lot don’t you think?
Okay. Let’s start making a junk journal notebook!
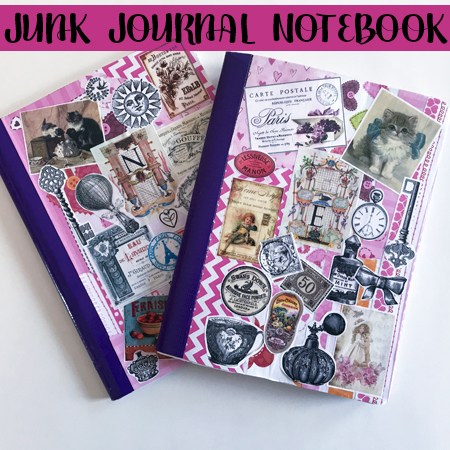
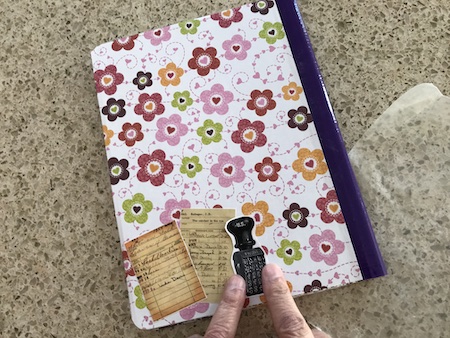
The composition notebooks have a black binding. Black. Blech! I didn’t think it would be very appealing to my granddaughters so I covered that black with purple colored duct tape.

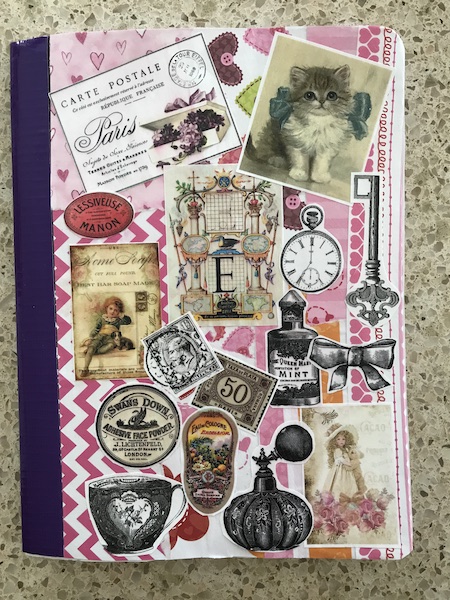
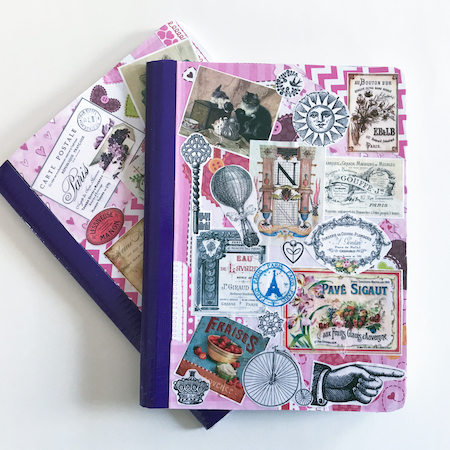
Then, I cut out the images. I used between 12 to 15 images for the front. I used about 15 for the back. I used about 15 for the inside cover and 15 for the inside back cover. So, if you cover all the sides that I did, you’ll need lots of images.

I tore scrapbook paper into pieces.

I brushed Mod Podge on part of the front cover.
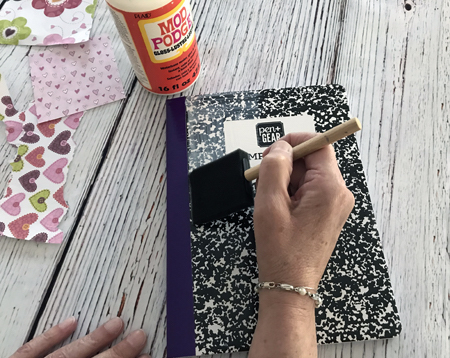
I put pieces of the torn scrapbook paper on the Mod Podge and pressed down really good so there weren’t any bubbles under the paper.

I covered the whole front cover with torn scrapbook paper.
That’s when I learned my first and second lesson.
I realized that I would cover most of the scrapbook paper with the graphics that I had printed. Which meant that the scrapbook paper would hardly be seen. So for the inside covers and the back cover, I decided I would just use one solid piece of scrapbook paper.
Now for my second lesson!
Because the cover of the composition notebook was paper, the moisture from the Mod Podge made the cover curve up. The cover would not lay flat. I was not a happy camper. No siree, Bob!
I let the cover dry so it wasn’t sticky to the touch. Then, I tore a piece of waxed paper and place it over the cover. Then, I put 3 large soup cans on the notebook. (The wax paper made sure the cover wouldn’t stick to the cans and so that the cans wouldn’t make indentations on the cover.)
I let the cover dry really good. The weight of the soup cans made the cover lay flat. Yippee!
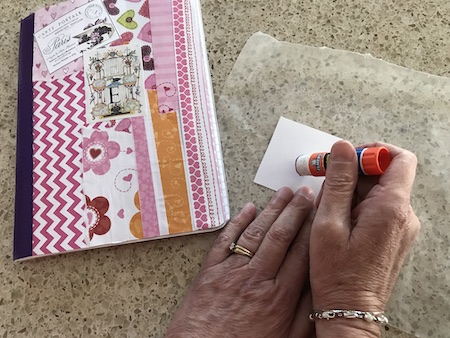
I didn’t want any problems with the back cover curling up so I didn’t use Mod Podge to put the scrapbook paper on the back or inside covers. I just used a glue stick and put tons of glue on the paper.
Originally, I thought that I would apply the graphics on with Mod Podge. But I worried that If I did, the cover would curl up again. So I used a glue stick to glue them on.
I got a piece of waxed paper. I put the graphic on the waxed paper while I put glue on the back of graphic. (I didn’t want glue all over my counter.)
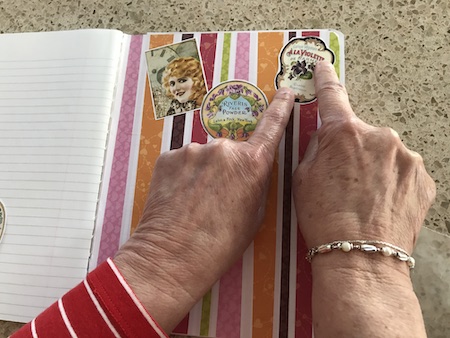
I glued some the images on at an angle and some slightly overlapping others. I put images on the front cover . . .
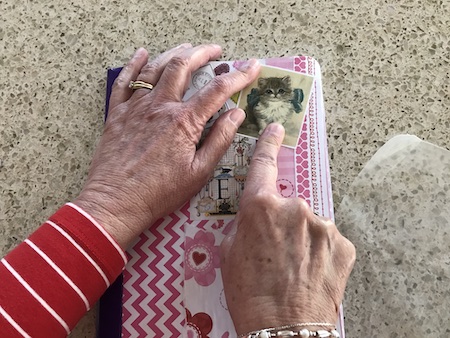
. . . and on the back cover.
And I glued images on the inside of the covers.
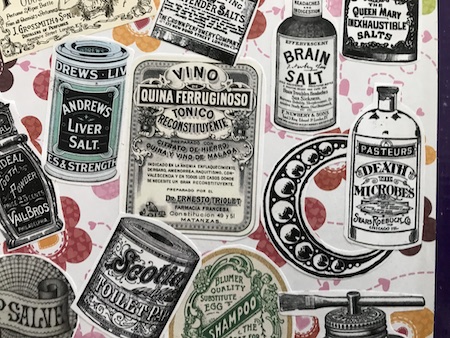
I think the bottle of brain salt and the bottle of death to microbes are a hoot! And the liver salt one, too.
I made 2 notebooks which went to sisters. I thought I would personalize the notebooks by putting their initial on the front. I found a great site with calligraphy letters so I printed an E for Emma’s notebook and an N for Natalie’s.
Can you find the letters?

Since the outside covers would get the most wear and tear, I decided to cover them with Mod Podge to add protection. I knew that I’d have to use the soup cans to keep the covers from curling up. I was okay with that.
That’s when I learned my third, fourth, and fifth lessons. Sigh.
As I was spreading the Mod Podge, the graphics started coming off. And so did the scrapbook paper that was glued on with a glue stick.
Yikes!
The only thing I could figure out was that the moisture from the Mod Podge softened the glue from the glue stick enough to make the graphic curl up. That was the third lesson.
The fourth lesson was that even the scrapbook paper started coming off.
So I pressed the pictures down. I pressed the scrapbook paper down.
The scrapbook paper got bubbles under it. As I pressed it down, the scrapbook paper wrinkled. I worked and worked to get the wrinkles out. I did for the most part.
Then came the fifth lesson. Because I used so many graphics, I ran out of images. I was too lazy to go to the printers to print more on a laser copy machine. So I printed more on my ink-jet printer.
As I was pressing and rubbing, the ink from the graphics that I printed on my printer started smearing. (Remember when I said earlier that I’d talk about printing on a laser printer? Well this is why laser copies are important.)
Yikes again!
I decided I wouldn’t tell my granddaughters. What they didn’t know wouldn’t hurt them, right?
All in all, I was happy with the finished junk journal notebooks.
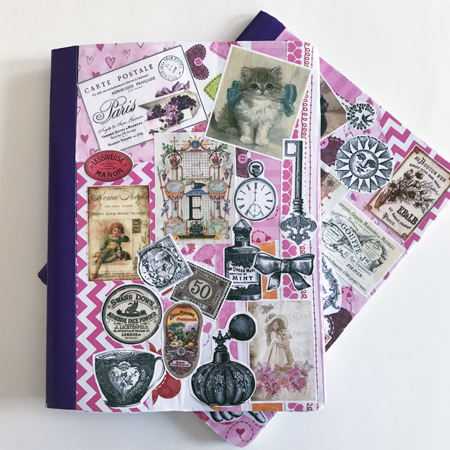
When my granddaughters got their notebook in the mail, my daughter told me that they squealed with delight! Which made me happy.
So, in a nutshell, here’s what I will do different next time. I would use a whole sheet of scrapbook paper on the front and back instead of tearing the paper into pieces. I would NOT use Mod Podge at all. I would glue everything on using a glue stick.
Learn from me. Don’t do what I did.
Now a postscript about graphics.
One of the best places to find free graphics is on the Graphics Fairy website. A majority of graphics in my free printables are from her site. Here are links to more of her marvelous stuff.
- 11 pages of ephemera
- Beautiful faux vintage stamps
- 19 Perfume Bottles
- Pedestal Sinks
- Gorgeous rose bouquet
- Pretty violet bouquet
- 15 bike graphics
You can also find more wonderful free ephemera from these sites:
- Free ephemera sheets from Go Make Something
- Free ephemera from Pixabay
- Free graphics by the Dreams Factory
- 100 free ephemera-from Sweetly Scrapped
- Old Design Shop Blog click on Gallery to see all of the wonderful things there
- Fancy scissors from the Old Design Shop
I also came across some beautiful vintage postage stamps made by the Dreams Factory. You can download them here. (After printing them, cut them out with pinking sheers or decorative edge scissors.
This ought to provide you with oodles and oodles of free graphics to use!
So, there you have it. Directions on how to take a boring old composition notebook and turn it into a beautiful junk journal one that you’ll want to use all the time!


4 thoughts on “Junk Journal Notebook”
Wow, Nina! What a great post ! and your freebies are marvellous. Just the things I love to use in /on journals! Thanks so much.
I have a question – I don’t think I’ve asked this before ?? but here it is again if I have….when you say personal use only – does that
mean we cannot use any of your images in journals we might sell? or that we can’t sell the images themselves? OR
No use of them at all in anything sold?
thanks,
bev.
You can use my images in journals you might sell. You cannot sell the images themselves. Hope this helps!
Very helpful! Thank you, Nina! 🙂
I love these, Nina! I want to make some. I’m so glad YOU figured out all the challenging parts and now I’ll know from the get-go how to overcome the issues. A huge thanks for the graphics links, too! ?