
Utah (where I live) celebrates the 24th of July as Pioneer Day. It is a state holiday that commemorates the day that a wagon train of members of the Church of Jesus Christ of Latter-Day Saints entered the Salt Lake Valley after making an arduous thousand-mile journey.
Since the 24th is next week, I thought that I would share a pioneer handkerchief doll craft that you can have your granddaughters make.
For this doll, you will need:
- 1 handkerchief
- 3-4 cotton balls
- Rubber band
- Ribbon
- String

(I’ve made a PDF of the directions to print off if you would like. That way, you don’t have to keep referring to your tablet/phone/computer.)
Lay the handkerchief right side facing down.
Fold the top down toward you about 2 inches making a flap.
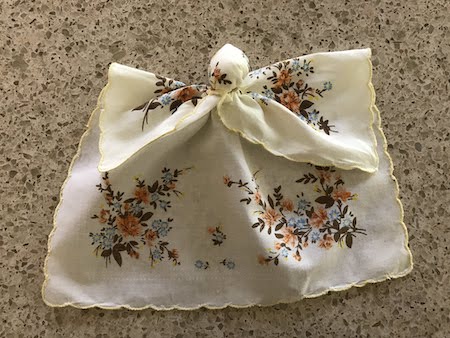
Place the cotton balls in the middle underneath the flap. Wrap a rubber band around the cotton balls several times. This forms the doll’s head.
Pull the top left corner of the handkerchief up above the doll’s head. Fold the left side into the center.

Pull the top right corner of the handkerchief up above the doll’s head and fold the right side into the center.

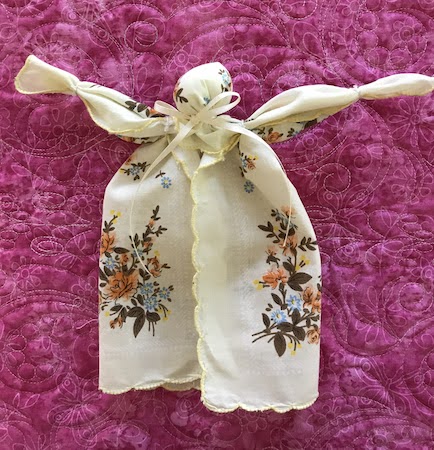
Bring the top left corner out to the left side. Bring the top right corner out to the right side. Your doll should look like this.

NOTE: because the handkerchief started out with the right side of the handkerchief face down, when you fold the sides in toward the middle, the right side is now facing up. This becomes the doll’s dress.
Cut a piece of string. Lift up one of the ‘arms’ and wrap the string around it as close to the doll’s head as you can get it.

Tightly knot the string.

Trim excess string.
Do the same to the other arm.
Cut another piece of string and tie it close to the end of the arm making a hand. Trim the excess string.
Do the same thing to the other arm.

Cut a piece of ribbon and tie it around the doll’s neck.
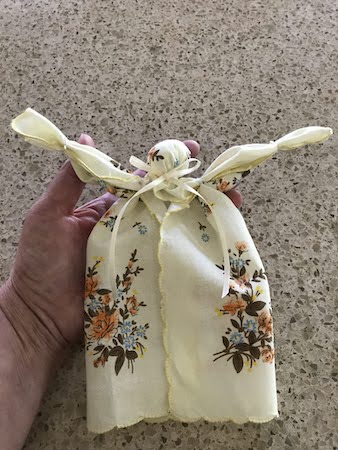
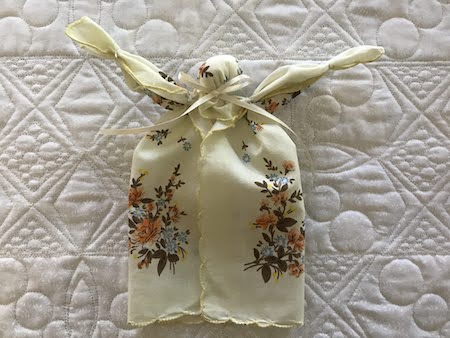
Ta da! Your pioneer handkerchief doll is finished!
Because of COVID-19, I don’t see my granddaughters. So, I’m going to send them everything in the mail so that they can make their pioneer handkerchief doll at their home.
Now let’s have a little chat.
I ordered a package of pretty vintage handkerchiefs on Amazon. They were just under 11 inches square. The size was okay but I almost wish they were a tad bigger. (But I don’t know if they make bigger handkerchiefs for women.)
They were stiff when I got them. I washed them by hand and dried them on low in the dryer. I didn’t want them to shrink. They were much softer afterwards.
Since they were 100% cotton, I had to iron the handkerchiefs. Rats. I’m not thrilled when I have to iron something . . .
I’ve seen one version of this handkerchief doll that tied knots in the handkerchief to make the doll’s arms.
I struggled and struggled to knot the arms. Part of that struggle was due to the fact that the handkerchief was rather small and there wasn’t enough fabric to easily knot. (Part of it was due to the fact that I’m all thumbs . . . )
I figured out that if I struggled, so would my young granddaughters.
So instead, I decided just to use string to make the arms. I think it worked out fine.
I hope your granddaughters have fun making this handkerchief doll!


7 thoughts on “Pioneer Handkerchief Doll”
I would not use a rubber band as a toddler could swallow if taken off. A few hand sewn stitches would work fine. Thanks for this I will copy/paste the instructions.
thank you for the information
I loved making these from a collection on vintage hankies which had belonged to my mother-in-law. Best instructions I have found for these dolls so far. The history is so touching
Your comment is so kind! You are lucky that you had vintage hankies. (I’m not sure if I would want to have my young granddaughters use vintage hankies. Because they are young, they will play with them. Older granddaughters would appreciate a pioneer doll from their grandmother’s handkerchief and probably just display their doll on a shelf instead of playing with it.)
I was thinking maybe using small rubber bands or ribbon? I had a larger hanki and the tying was easy. Haven’t tried a smaller one yet.
Yes, a small rubber band or a small ribbon should work. In fact, a small ribbon would be really cute on the doll!
Your doll is so stinkin cute !! Your kerchief is so elegant too. Thank you for joining the Meraki Link Party at http://www.doodlebuddies.net