Our daughter and her three terrific children visited us one day during their spring break.
Of course there were lots of things to do at grandma’s house.
They played outside on the swings.
They followed grandpa around as he fertilized the lawn. (Hmmmm . . . not a super exciting thing to do in my book but the grandkids loved it. Probably because they just loved being outside on a nice day!)
They drove our little battery operated Jeep. Natalie is almost too big for it. Her legs hardly fit in as she sat in it. But it fit Emma just fine.
And, while they played outside, I snuggled with baby Isaac who is now 3 1/2 months old. He sure is a chunky baby! But, that just meant I had lots of chubby cheeks to smother with kisses.
Of course I had crafts for the kiddos.
One craft was a stained glass kite. (I’ll be posting the other crafts over the next week or so.)
Somehow, between all of the smooches that I gave Isaac and with Natalie and Emma swooping in from outside, I neglected to take a picture of the supplies that you’ll need for this craft. Sheesh!
So, here’s the list of things that you’ll need:
- scissors
- ruler
- pencil
- black construction paper
- colored tissue paper
- clear contact paper
- card stock or scrapbook paper
- yarn
- hot glue gun
First, you’ll need to cut out a kite ‘frame.’ Take the black construction paper and fold it in half lengthwise.

On the open side (not the side with the fold), make a mark 4 inches down from the top of the paper.

Draw a line from that mark to the top of the folded side.

Then, draw a line from that 4 inch mark to the bottom of the folded side.

Draw lines inside those lines about about an inch apart. This is to make the ‘frame’ of the kite.
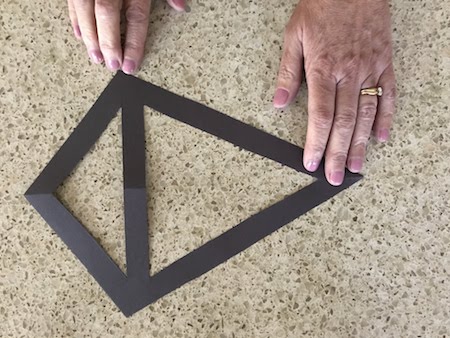
The next step is rather hard for me to explain. You’ll need to draw 2 lines about an inch apart for the cross piece that goes from the 4 inch mark straight across to the folded side. (See the picture of the cut out kite to see what the frame should look like.)

Cut along the lines that you have drawn.

Unfold the paper. This is what your kite frame will look like.

Cut a piece of clear contact paper large enough to put your kite frame on it. Press the kite frame down really good so it will stick to the contact paper.
Cut the tissue paper into small pieces. Randomly place the pieces on the contact paper inside the kite frame.

Use a variety of colors so your stained glass kite will be pretty. Cover all of the contact paper inside the kite frame.

When your finished, cut another piece of contact paper and carefully place it on top of your kite. Press it down really good. Carefully trim the excess contact paper along the edge of the kite.
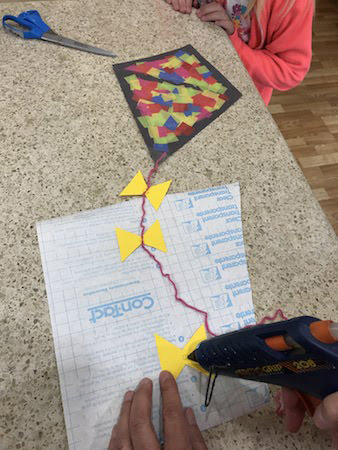
Cut a piece of yarn for however long you want the kite’s tail to be. Tape it at the bottom of your kite. Cut out bowtie shapes from your card stock or scrapbook paper.
Add a dab of hot glue on the center part of the bowtie. Press the yarn into the glue. Let the glue cool.

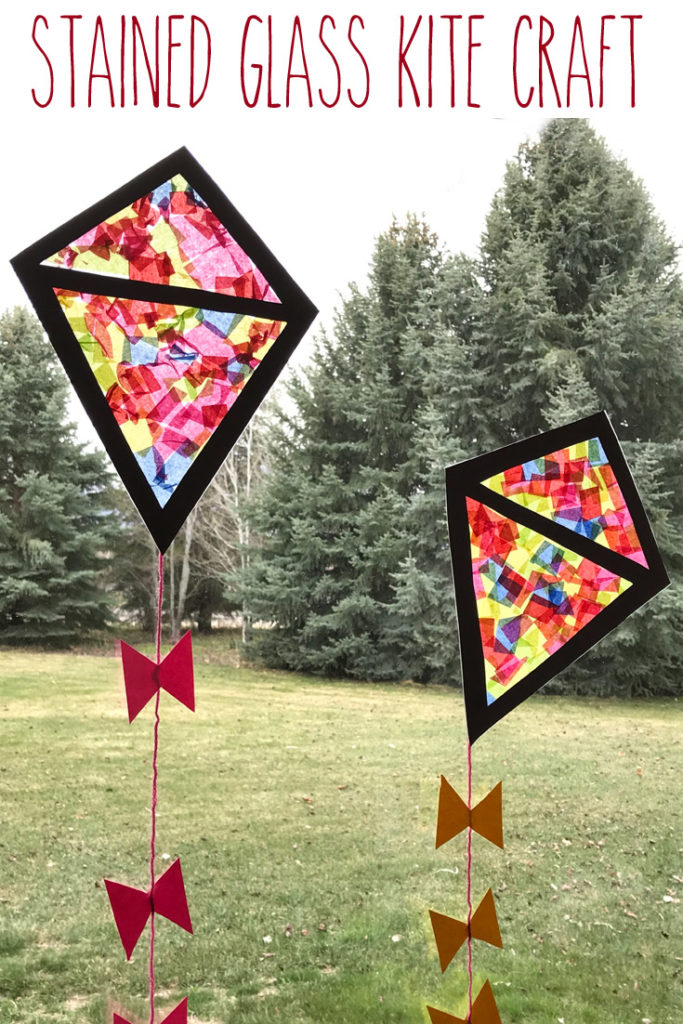
Ta da! Their stained glass kites are finished!

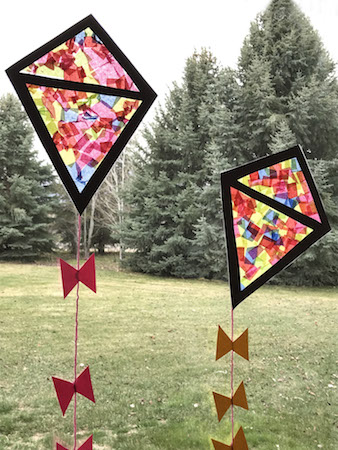
We taped them on the window to let the light shine through them. This picture doesn’t do the kites justice,. The sun shining through the ‘stained glass’ part made the kites really, really pretty! (It was overcast when I took this picture so the sky isn’t blue at all. Darn it!)

(Your grandkids might also like making wind spinners.)
Between crafts, we also had a tea party where the girls dressed up. What a great time we all had!


3 thoughts on “Stained Glass Kite Craft”
Hi Nina, I have add your kite craft pagelink (and name) in my kite blog! https://y.is/OPe9C
That is so sweet of you! Thanks so much.
cute