
It’s always great fun to make Valentine’s Day crafts with the grandkids!
There’s just something special about making these crafts with little people that you love so much!!
Today, I have a terrific craft that is super easy to make. (Little grandchildren might need help cutting out the hearts. But if you have a heart-shaped paper punch that makes it so much easier!)
Another thing. You can jazz up this craft or keep it simple. Your choice.
This Valentine tree doesn’t require any special supplies. In fact, I bet that you have everything on hand.
(If you’re like me, you probably have a stash of construction paper or card stock paper already in your craft supplies!)
Here’s what you’ll need:
- Red, white, pink, and purple construction paper
- Scrapbook paper with Valentine designs
- Scissors
- Glue sticks
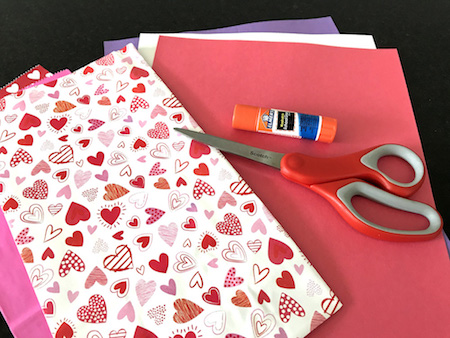
Before I go any further, let me talk a wee bit about colors of paper. When I put the purple paper with the red, it looked blue. So I ditched the purple paper. Maybe a different hue would look okay but at the time this was all that I had at the time.
You’ll also see some pink paper peeking out at the bottom left of the picture. Now, I’m not a graphic designer by any means. However, hearts cut out of that pink paper jarred my design sensibilities. Maybe a different hue would work but that was all that I had on hand at the time. (Read that to mean I was too lazy to go to the store in search of different colors for this craft.)
That being said, I think that my final product looked just fine using only red and white colors for my tree.
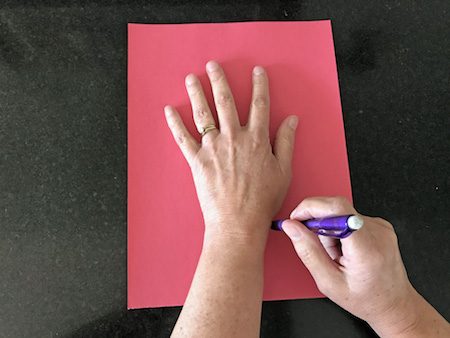
Have your grandchild place her hand on a piece of red construction paper with her fingers slightly spread out. (You could use pink, white, or purple — or even brown — for the tree if you want.)
Make sure you trace an inch or so down her arm. Stop tracing when you are about 2 inches from the bottom of the paper. Then draw lines on both sides that go straight out to the edges.
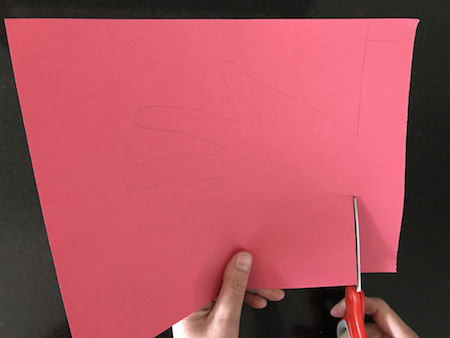
Cut out around the hand.
Cut out a bunch of small hearts.

Fold the hearts in half. Put glue on the back side of one half and press randomly onto your tree. (Bent hearts make the ‘leaves’ stick out which I think is cute. But, if you want flat leaves, that’s just fine!)
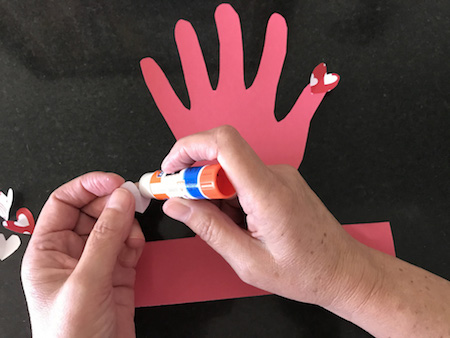
When you are satisfied with how many leaves you have on your Valentine tree, loop the long strips and glue them together. This makes the stand that holds up your tree.
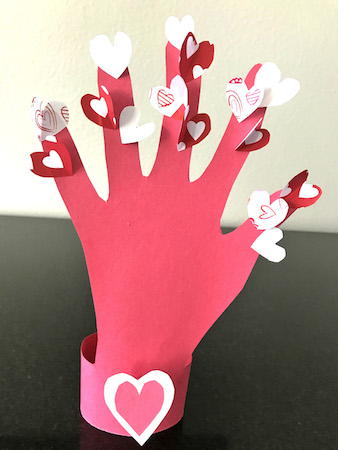
Notice the hearts at the bottom? I cut a small strip of red paper and fan folded it a couple of times. I glued it on the back of the heart and then to the base of the tree. This make the heart stick out.

Let’s chat a little bit about how to jazz this little tree up, shall we?
If your grandchildren don’t want to do the heart on the ‘wrist’ area, they could draw it on instead. They could glue a string of sequins for a glittery bracelet. They could glue on a jewel for a ring on one of the fingers. Whatever their creative minds come up with will be fantastic.
However, one suggestion. If you are going to add bling to your Valentine tree, I suggest that you use card stock instead of construction paper. Card stock is sturdier and would be able to hold the weight better.
Happy crafting!


3 thoughts on “Super Easy Valentine Tree Craft for Kids”
What a fun idea! Thanks for sharing at #blogginggrandmotherslinkparty
I love the idea of the glittery bracelet on the wrist. This is a fun craft for the kids. Thanks for sharing on Sunday’s Best.
Rhonda, yes, bling is always good — whether on a craft or on our own wrists! Thanks for dropping by!