When you want to do a Halloween craft with grandkids, and the ages of those adorable grandkids range from 13 down to 4, it’s challenging to find a craft that all of them can do. Do you ever face that same dilemma?
This Halloween block craft is something that older grandkids can do and young ones, too. I’ll explain how in a wee bit.
So, let’s get down to business, okay?
But wait a minute. I usually take a picture of all of the supplies that you’ll need for the craft. However. I forgot to take a picture. I was more focused on my cute grandkids instead of taking pictures. Sigh.
Anyway, here’s the list:
- a 2 inch wooden block for each grandkid
- my free Halloween graphics
- acrylic paint in Halloween colors
- sponge brush
- Mod Podge
- paper plates
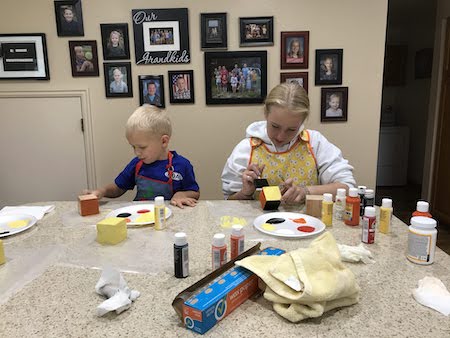
Before you get started, I suggest you give your grandkids aprons to protect their clothing. Also, get something to protect your working surface. (We used waxed paper.)
First, you need to download the graphics for your blocks. You need 6 pictures for each cube.
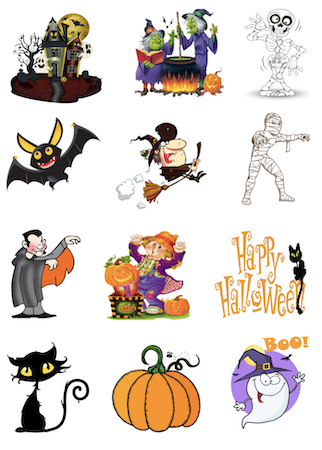
I have 3 sets of graphics. This is the first set. The picture below shows what’s in it. (I love the witch in the top left corner and the skeleton below it!) Click here to download it.
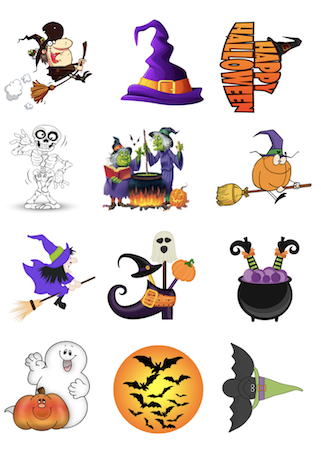
Here’s the second set of graphics. The picture below shows what’s in this one. (The goofy Frankenstein captured my heart. And the orange-striped witch’s hat, too.) Click here to download it.
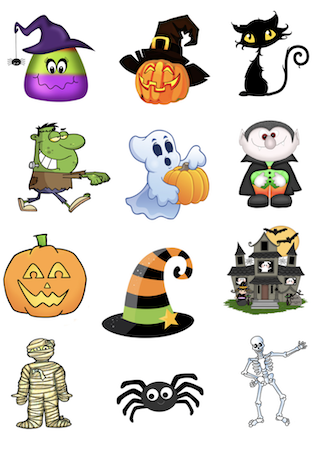
This is the third set. See the picture below for what’s in it. (You’ll notice that there are a couple of duplicates of what’s in the other sets. That’s because I thought that maybe more than one of my grandkids would want the same graphic. Oh. And that bat. That’s about the cutest bat that I’ve ever seen.) Click here to download it.
Make sure you print them on a laser printer. If you use an ink jet one, the Mod Podge will smear the ink.
So let’s get painting.
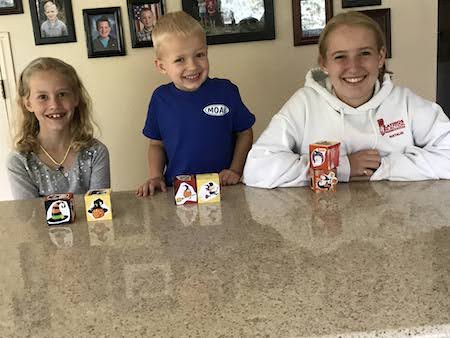
Squirt some paint on a paper plate for each grandkids. Then they can go to town paining their cube.
This is where this craft can work for different aged kiddos. The youngest can slap paint on his wooden cube with wild abandon. (That’s their skill level.)
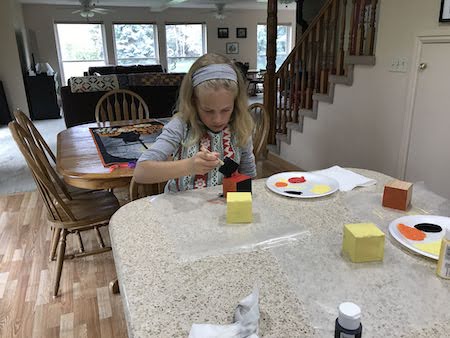
Granddaughters that are 9 will carefully paint their block. (Especially when they are really in to artistic activities.)
And the 13 year-old? She can get creative with her painting. Like painting dripping blood. Or flames of fire. Or any other clever idea that comes to her.
Painting . . .
. . . and painting.
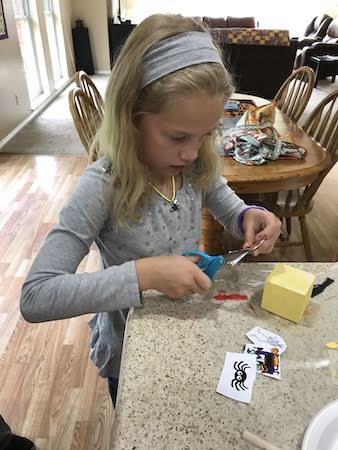
While the paint is drying, cut out the graphics.
Then, slap some Mod Podge on one side of the cube. Firmly press a graphic on. Keep adding graphics to all sides.
When that Mod Podge is dry, coat every side with more Mod Podge. Let it dry.

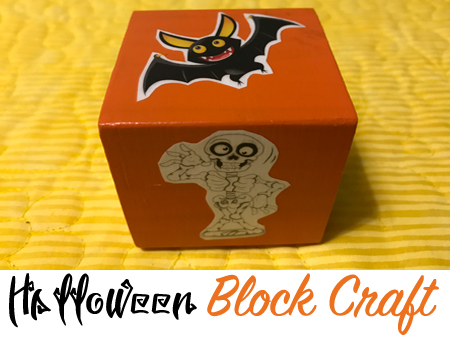
And that’s it. You Halloween cube is finished.
Aren’t they cute? Oh, the cubes are cute, too.